 Have you got about $7 and one hour?
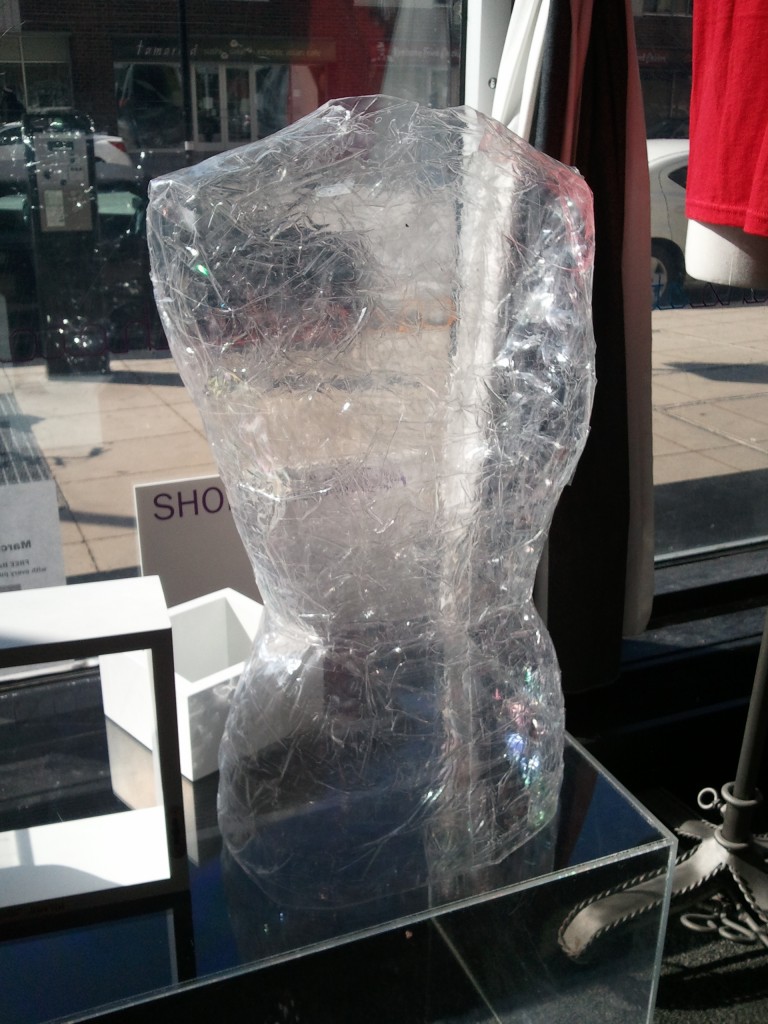
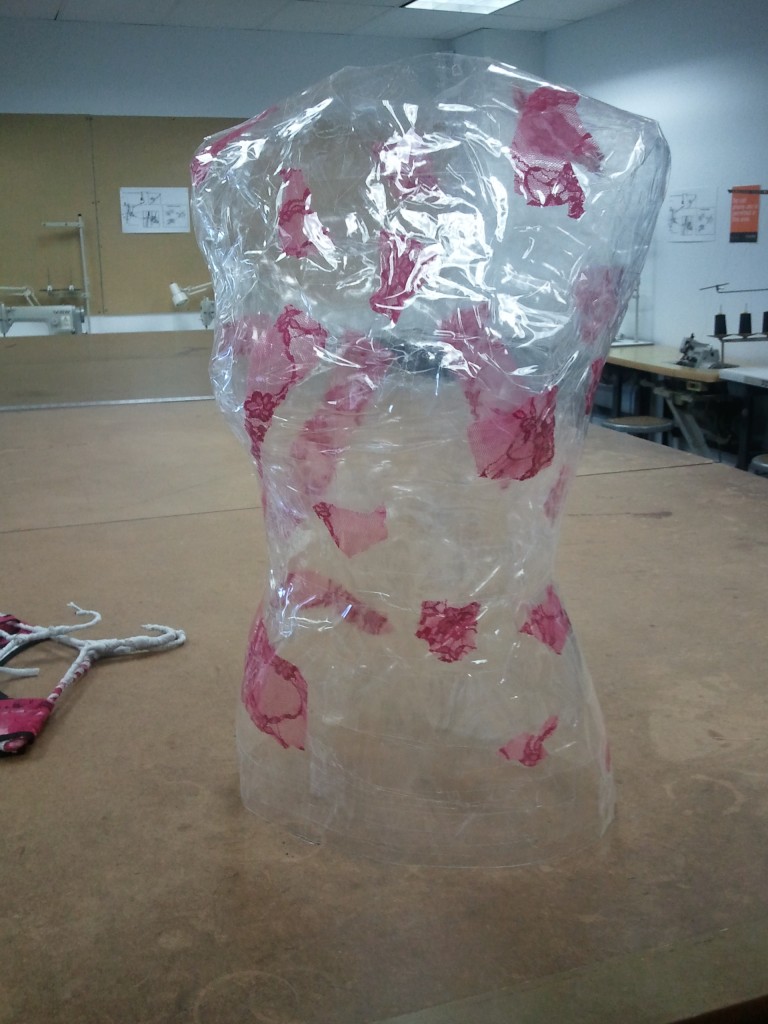
Check out what you can make! Here’s my really cool mannequin made out of packing tape. This would be terrific for a trunk show in a retail store, home party, or for a display if you’re doing a trade show. I learned how to do this from student in my Sustainable Design Class at Columbia College. Check out how we did it…
Here’s what you need to get started:
- 2 rolls of heavy duty packing tape
- a dress form to borrow for the shape
- scissors
- a few pins
Your First Step
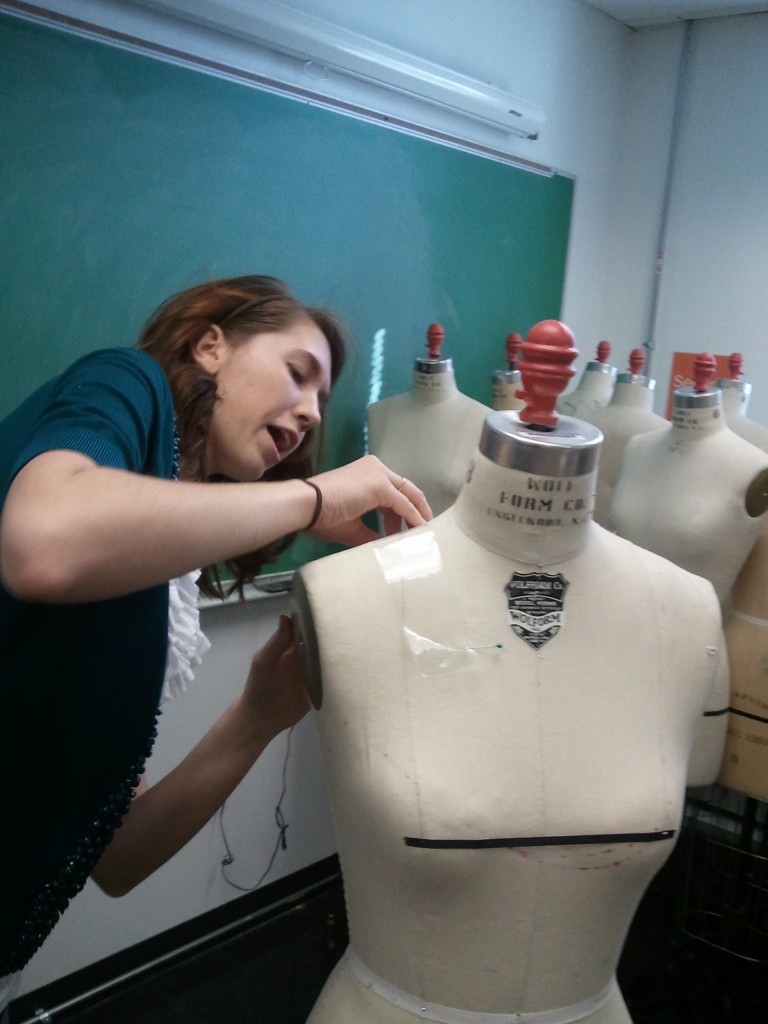 It’s good to have a helper in this project if you can – at least at the very beginning. You want to cut a few strips of tape about 8 – 10 ” long. Then lay a strip sticky side up on the shoulder of your dolly.
You can pin it to the form to try to keep it in place. This is when it’s handy to have your buddy hold it in place.
Take another strip and lay it right next top the first one overlapping just a but so the tape sticks together.
Step 2: Keep going
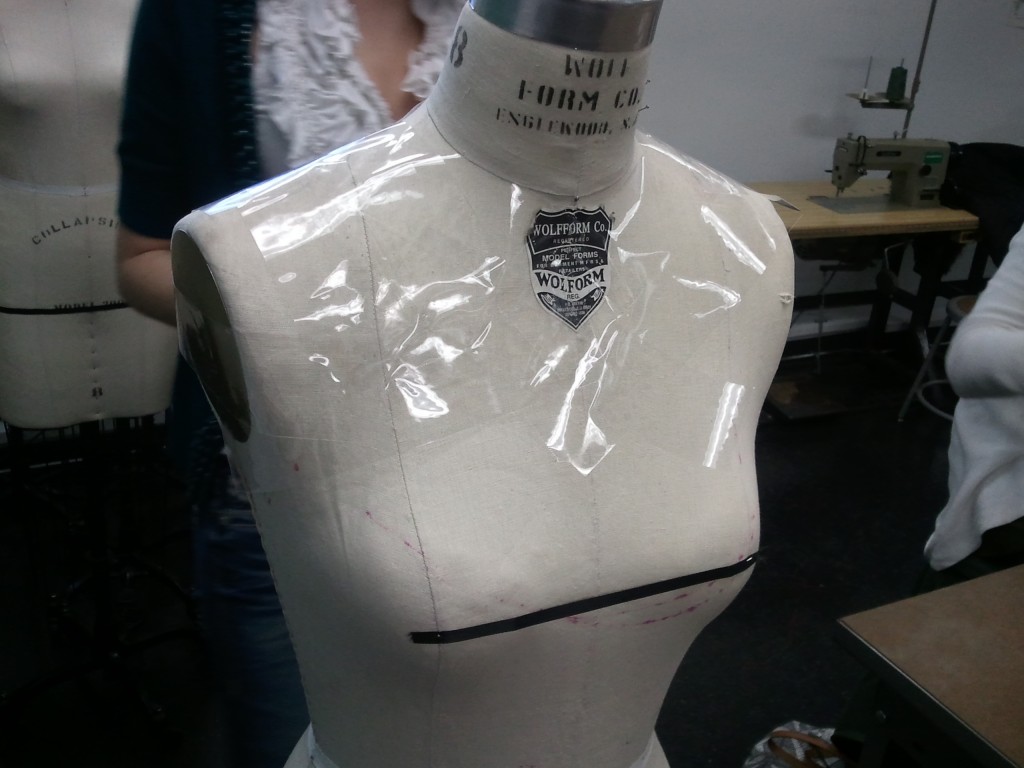
Keep adding tape strips sticky side up – even covering the arm area like we’re doing in this picture below. You don’t have to worry about making it all neat and flat – I was worried about that in the beginning until I got the hang of it.
Step 3: Lather, Rinse, Repeat
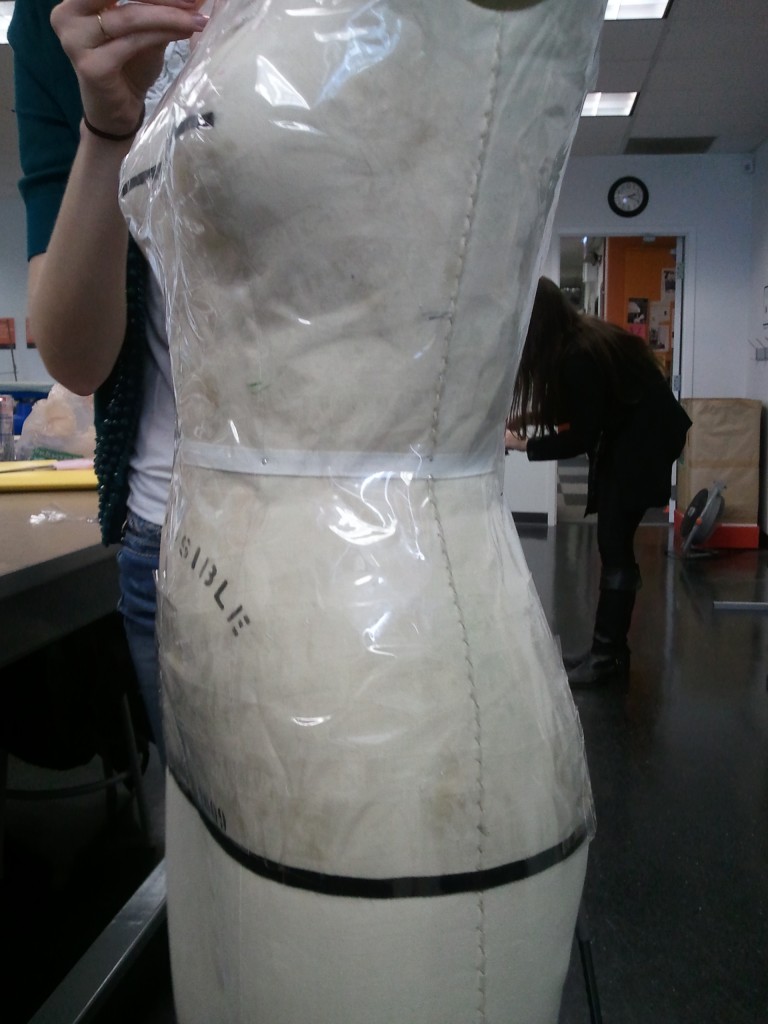
More and more tape strips sticky side up until you have covered the form to your liking in one big fly paper mess.
Check out this picture below to see how we stopped at the bottom in a straight line so our mannequin could balance nicely on a table for display.
Step 4: Turn your tape around
Now the project starts to pick up speed. Lay more strips on with the sticky side down until you cover the entire area. You can put things between the layers of tape.
You can see in this photo that one designer put lace fabric between the tape strips and it came out great.
I put a little love note to my kids in mine and one of my other students put bottle caps in hers to look like a funky necklace.
We were even thinking it would be really cool to put colored tissue paper in there and use a fake candle inside to light up the mannequin for decoration.
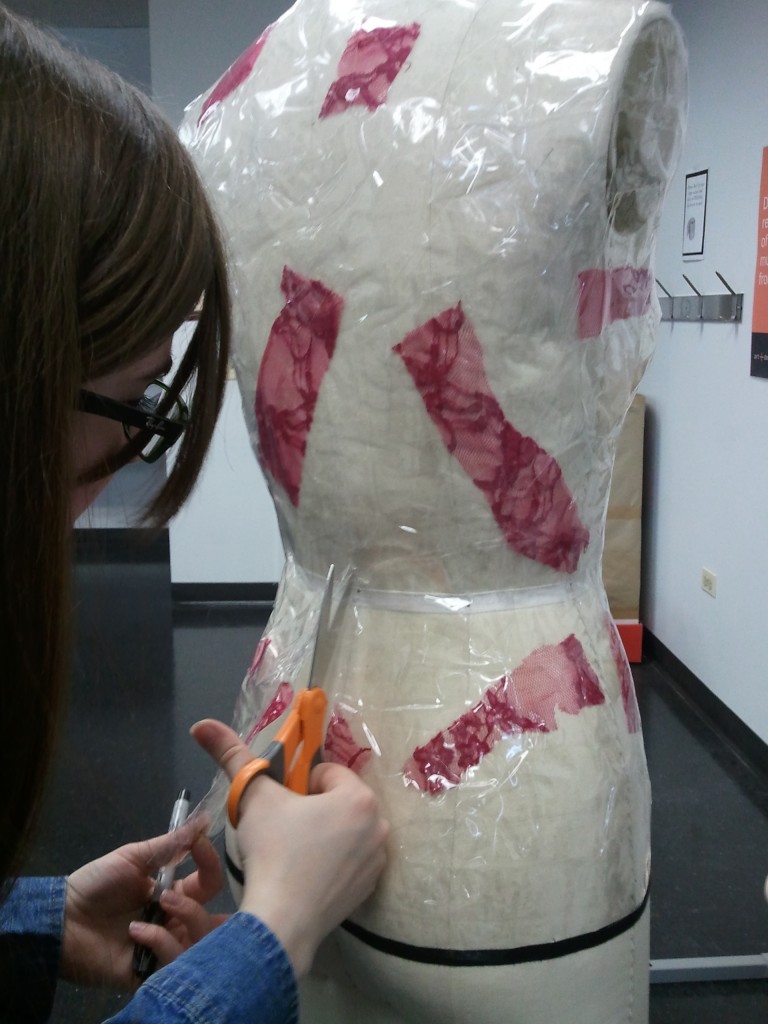
Step 5: Cut it off
So now you gently take your scissors and cut it off the form. After you remove it, just lay it on a table and tape the opening back together.
The Final Result
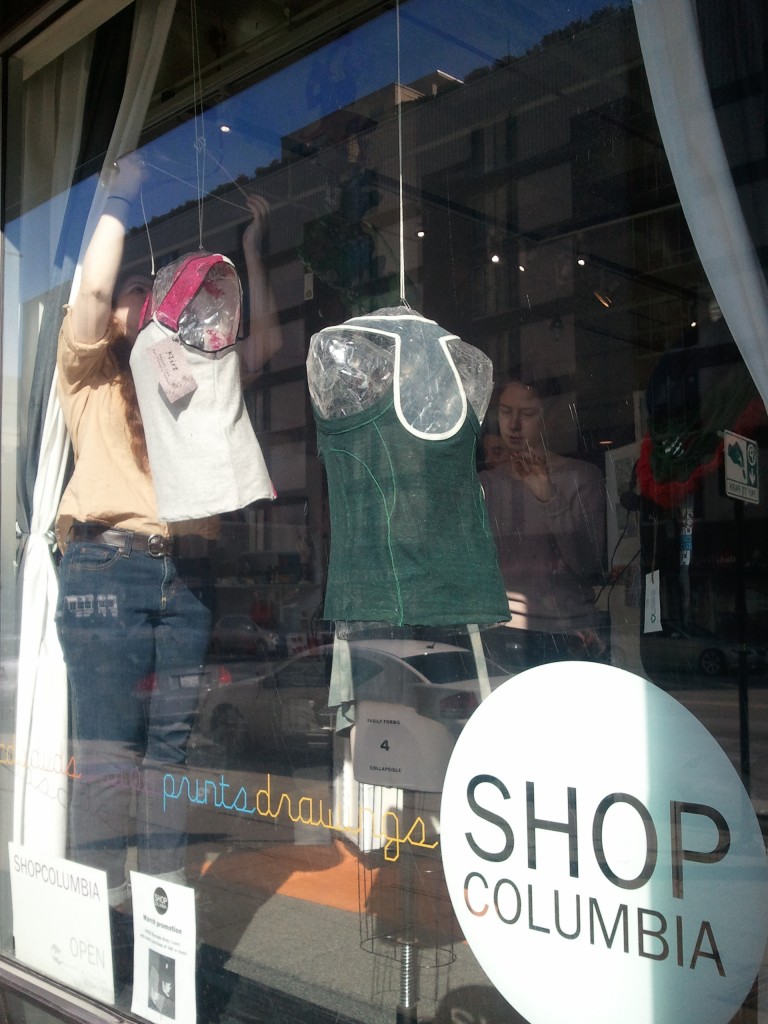
My students hanging their packing tape mannequins to display their designs in Chicago.
Et Voila, that’s what you get for 1 hour and $7.00
Did you like this post? Then kindly click the LIKE button and pass it on!
What do YOU think? Do you have ideas for ways to improve this project? Do you have a suggestion for simple displays you want to share? Let me know by leaving a comment below!
Thanks!
Jane
—————————————————————————————-
Want to use this article or video in your e-zine or or website?
Sure! Please include this complete blurb with it:
“Jane Hamill teaches apparel and accessories designers how to start and grow a profitable business – even if they flunked math and hate selling. Get her FREE report “How to Find Fabrics in Small Quantities and NOT Get Ripped Off in the Process” at www.fashionbrainacademy.com.”



3 Responses
Great idea. I’ve been tinkering around with papier-mache, but this is really cool. Thanks for sharing.
I just finished this- But I used a real person– I had them wear a large clear plastic bag like a t-shirt -then taped them up with the clear tape with out having to do the upside down tape step. It looks very artistic. Thanks for this great idea.
What a GREAT idea, Marilynn! Love the idea of using a real person. Do you have a photo? If so, I’d love to see it and you can post it here: https://www.facebook.com/fashionbrainacademy